Posts tonen met het label US terms. Alle posts tonen

dinsdag 9 november 2021

Pip, the reversible hat

These hats are made in carreaux crochet. Since crochet is not quit flexible it contains two tubes for elastic.
The basic is a border in the size of your head, getting larger as soon as it is the right height. Plus an open circle that you attach to the border.

The black and white version in this example is made with Azurite (Distrifil) - 50 gr ~ 140 m, I have used around 70 gram of each color. With 80 stitches I got a circumference of about 57 cm.


You start with chain stitches, in this case 80 + one to turn. Then 3x a row of single crochet. Put a marker or a clothpin in the loop.
Start with the other color in the first chainstitch (see end of the white yarn in the picture) and make 3 rows of single crochet stitches.
Fold together. Use stitch markers through both colors, in this case every 8 sts. In between I made 3 sc back on black / chs / 2 sc front on white / chs / 3 sc back on black.

In my blog you can find a basic explanation of this new crochet technique.

Finish the last cs with the loop of the other color - see images. And make the same row with this color.
A second row made 'color-on-color'.
After these dots follows the second tube. 3 rows sc with white, 3 rows sc with black.

Then again some dots with black, last stitch finished with the white loop. And this row repeated with white.


When the border has the height of the front you start increasing stitches. 6 per row when you make single crochet stitches, 12 when you make double crochet stitches.


The upper circle is started with two open circles. Start with a magic loop or 3 chain stitches and then 6, 12, 18 sc and if you wish one more of 24 sc. Attach them with stitch markers to mark where you will increase in the next round. Make a front/back row with one color (black in the picture) and finish the last stitch with the loop of the other color.

Continue your open circle with single or double crochet. In case of sc increase 6 per row, in case of dc increase 12 per row. You can work in rounds, but it's more challenging with the color changes.

Another possibility is to continue with the border piece when you feel it is wide enough and decrease towards the top. 


Be sure to end with the same number of stitches on the border and the circle.

You might want to use dots with the same distance to make it easier to attach both parts later.
Close both sides of the circle with a tapestry needle. Be sure not to go to both layers.
Close the border the same way, but be sure NOT to close the two tubes. You might want to put a pencil in to remember ...
Attach the border to the circle.

You can either use yarn and a tapestry needle or work them together with croceht stitches, like sc in the border, ch, sc in the circle, ch etc.

Again, avoid working through both layers.
Put elastic in both tubes and tight the ends with a knot. Hide the knot in the tube. If you give this to someone show them how to get out the knot if they want to make the elastic more tight.

zaterdag 10 juli 2021

This Way


To explain how you can read a CRX* chart in different ways I made these four examples.

Basic colors for a CRX patch are A and B, they alternate sides and if you work with only two colors you get the same effect as double knitting.

The third color C stays on the same place.

1. C = lines of the signpole
2. Just two colors
3. C = the air
4. C = interior of the signpole

The basic design as it was used for the first patch with only color A and B. You alternate sides - front and back - whenever there is a blanc square followed by an X and vice versa.
C = lines of the signpole = X's

C = the air = blanc squares

C = interior of the signpole = yellow squares
Curious to try this out after you have got the hang of Carreaux Crochet
Reading a CRX chart works This Way


*CRX = Carreaux Crochet

maandag 23 april 2018

Maraya's Shawl (US terms / Français)

This shawl is made of borders with front post double crochet (fpdc) and filet crochet with half double crochet (hdc) in the inside. You can adjust the size of the shawl as well as the sizes of the borders.

Ce châle est composé de bords de brides en relief avec un filet de mailles en l'air et de demi-brides. La taille du châle, l' hauteur/épaisseur des bords, l'intérieur; Tout est ajustable.

In my blog you'll find the charts to make it or you can download an extended version for free on Ravelry.

Dans mon blog, vous trouverez les schémas pour le faire. Ou clicquez sur le lien ci-dessus, qui vous mène à une version étendue gratuite.


In the chart above there are 5 front post double crochets for the edges. You can customize it to the number you want.

Start with a chain of the wanted number of stitches

Row 1; 2 or 3 ch (= first dc), dc on each ch
Row 2; 2 ch, fpdc on each dc of the first row, 2 dc*

* Each row is increased with two stitches. In the odd rows at the beginning, in the even rows at the end. You start the even rows at the top of the shawl.

Le schéma ci-dessus contient 5 brides en relief. Cela peut être personnalisé!

Commence avec une chaînette.

Rang 1; 3 m. air (= 1er bride) puis une bride dans chaque maille de chaînette.
Rang 2; 3 m. air, brR (bride en relief - toujours avant pour cette châle!) sur chaque bride du 1er rang. 3 brides*

* Pas littéralement 3 brides, voir méthode 1 ou 2

A chaque rang augmente avec deux points. Les rangs impair au début, les rangs pairs à la fin.


When the borders have the size you want start making the holes with a chain stitch. Increase wiht one hole every row. Thus: ch, hdc, ch, (hdc, ch, hdc, ch, etc.). Mark the first and last hole with colored yarn. They are a bit smaller and are easily lost.

Quand les bords ont la largeur désirée commencez à faire le premier résille vide. Il est conseiller de mettre des fils en couleur dans les résilles vides le plus haut et le plus bas, car ils sont plus petit que les autres.

(x aantal bollen of gewicht = x number of balls or weight)

"x aantal bollen of gewicht" = x nombre de pelotes ou poids

When you have reached the desired height you start with the middle part wich is also straightforward on the bottom.

If you use gradient yarn or you have a limited amount of yarn: weigh the first point and start decreasing when you have the same amout left over.

Or put the same number of balls aside that you have used for the first point.

Quand vous arrivez à la hauteur désirée, commencez la pièce de milieu qui est tout droit en-dessous.

Si vous crochetez avec un fil dégradé (unikat) pesez le point avant de commencer le parti droit au milieu. Commence le deuxième point quand il vous reste le même poids.

Si vous faites ce châle avec un nombre limité des pelotes, gardez le même nombre pour le deuxième point que vous avez utilisez pour le premier.


The butterfly can be put on any place and you can make as much as you wish. See shawsl above for examples.

Mettez autant de papillons que vous voulez. Voir les deux châles en haut de ce blog en exemple.

For the second point you have to decrease two stitches every row - see charts below.

Pour le deuxième point diminuez deux maille à chaque tour - voir les schémas en-dessous.

And of course you can make other motifs if you like. See some of my other shawls for ideas.

Et bien sûr, vous pouvez faire d'autres motifs si vous le souhaitez. Voir quelques-uns de mes autres châles pour vous donner des idées.

maandag 16 april 2018

Crochet & Weave - "Weefhaken"

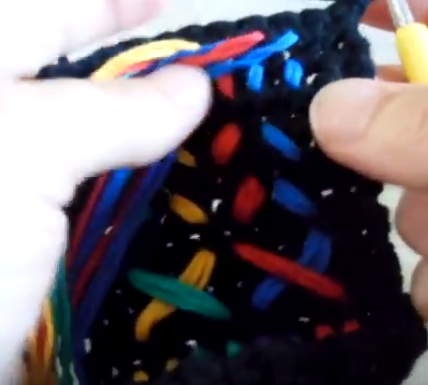
A small bag, made of single stich crochet & colored yarn woven between these stitches.
The first bag - on the right in the left picture - was made according to that idea.
Then I started to exchange the colored yarn to make crosses.
Simple weaving
Small crosses
Big crosses
Variation
Colormix
Watch the videos (be sure to put the volume down!) by clicking on the links:
Simple weaving
Small crosses
Big crosses
Variation
Colormix
Improvising and trying out
Basic chart - start with a chain - bottom right on the start

Or bag and shoulderstap apart

More pictures on my website or check my Ravelry shop for pictures and pdf